During the month of June, I have been writing about live streaming your new music concerts. Live Streaming 101 dealt with the “why” of live streaming. Live Streaming 102 discussed where to host your stream. This week’s installment will discuss some technical requirements for live streaming, but without diving in so deep that you get lost in the ones and zeros of the codec. By the end of this post, however, you should be armed with the basic skills and knowledge required to get a live stream up and running.
Site Preparation
The first thing any stream needs is a reliable, speedy internet connection. To simplify things, here is an internet checklist for your live streaming venue:
1. Get the WiFi/internet login information
2. While you’re at it, if applicable, get the contact info for the IT person or team
3. Get online and do a speed test (google “speed test” in a browser and use the google version)
4. Do a stream test
What matters most when it comes to internet speed for this application is the upload speed. This article has a great, in-depth description about live streaming and internet speeds. The gist is that higher quality streams carry more information (video resolution, audio bit depth) and thus need higher upload speeds.

If you decide not to use mobile devices or WiFi (which inherently run more risks than a hard-wired connection), you should find an ethernet port and work with IT to make sure you have access. Some schools, companies, or public school venues have firewalls built in to their internet connections, so it’s important to learn about your venue and to make sure you can get to your streaming destination as described in the previous article.
Apart from the internet, it’s also important to test the lighting, sound, and proposed camera locations for your live stream. If you are working primarily with mobile devices, finding camera points close to the stage—but not blocking audience view—will likely be ideal. If you are working with external cameras and a separate encoder, you’ll want a room outside of the hall to run cables to, where your video team can talk freely, and where any computer keys or cooling fan noises (yes, this happened to me during this stream) will not distract from the performance.
iOS and Mobile Tech Camera Set Ups
For the beginner, starting with mobile technologies is the easiest way to go live. Facebook, Twitter, Instagram, and YouTube all have this option in their mobile apps. The resolution and FPS of recent smartphone cameras is high enough to make a nice looking video. You don’t even need the latest iPhone to stream in HD!
But there are two downfalls to streaming with a single mobile device. 1.) the variety of shot is nil. So make sure when you set your shot, it is up close and tightly framed, so your subjects are in clear view. 2.) research and listening suggests smartphone microphones are optimized for the human voice, not your music. So I recommend the addition of a smartphone microphone or compatible audio interface to connect your mics to.
Next, I will take you through some specific tech I have either used or researched with the help of some tech experts from Sweetwater. I have also included Amazon affiliate links where applicable, which will support New Music USA. (If you are shopping on Amazon, you might also consider using Amazon Smile to support their work.)
Mobile Tech Highlights: smartphone audio
Disclaimer: I have received no compensation in exchange for recommending any of the following products. I simply either have used the product itself or it seems well suited to the DIY Live Streaming specs I researched while planning these articles.
For mobile phone audio, I always recommend a microphone or an interface that can handle a stereo signal. Nothing sounds more natural than a stereo signal on a good microphone, I mean, we have two ears, right? There are piles of mono options, but I wouldn’t recommend any of these for live performance streaming.
Shure MV88: stereo mic with multiple patterns, gain control, etc.
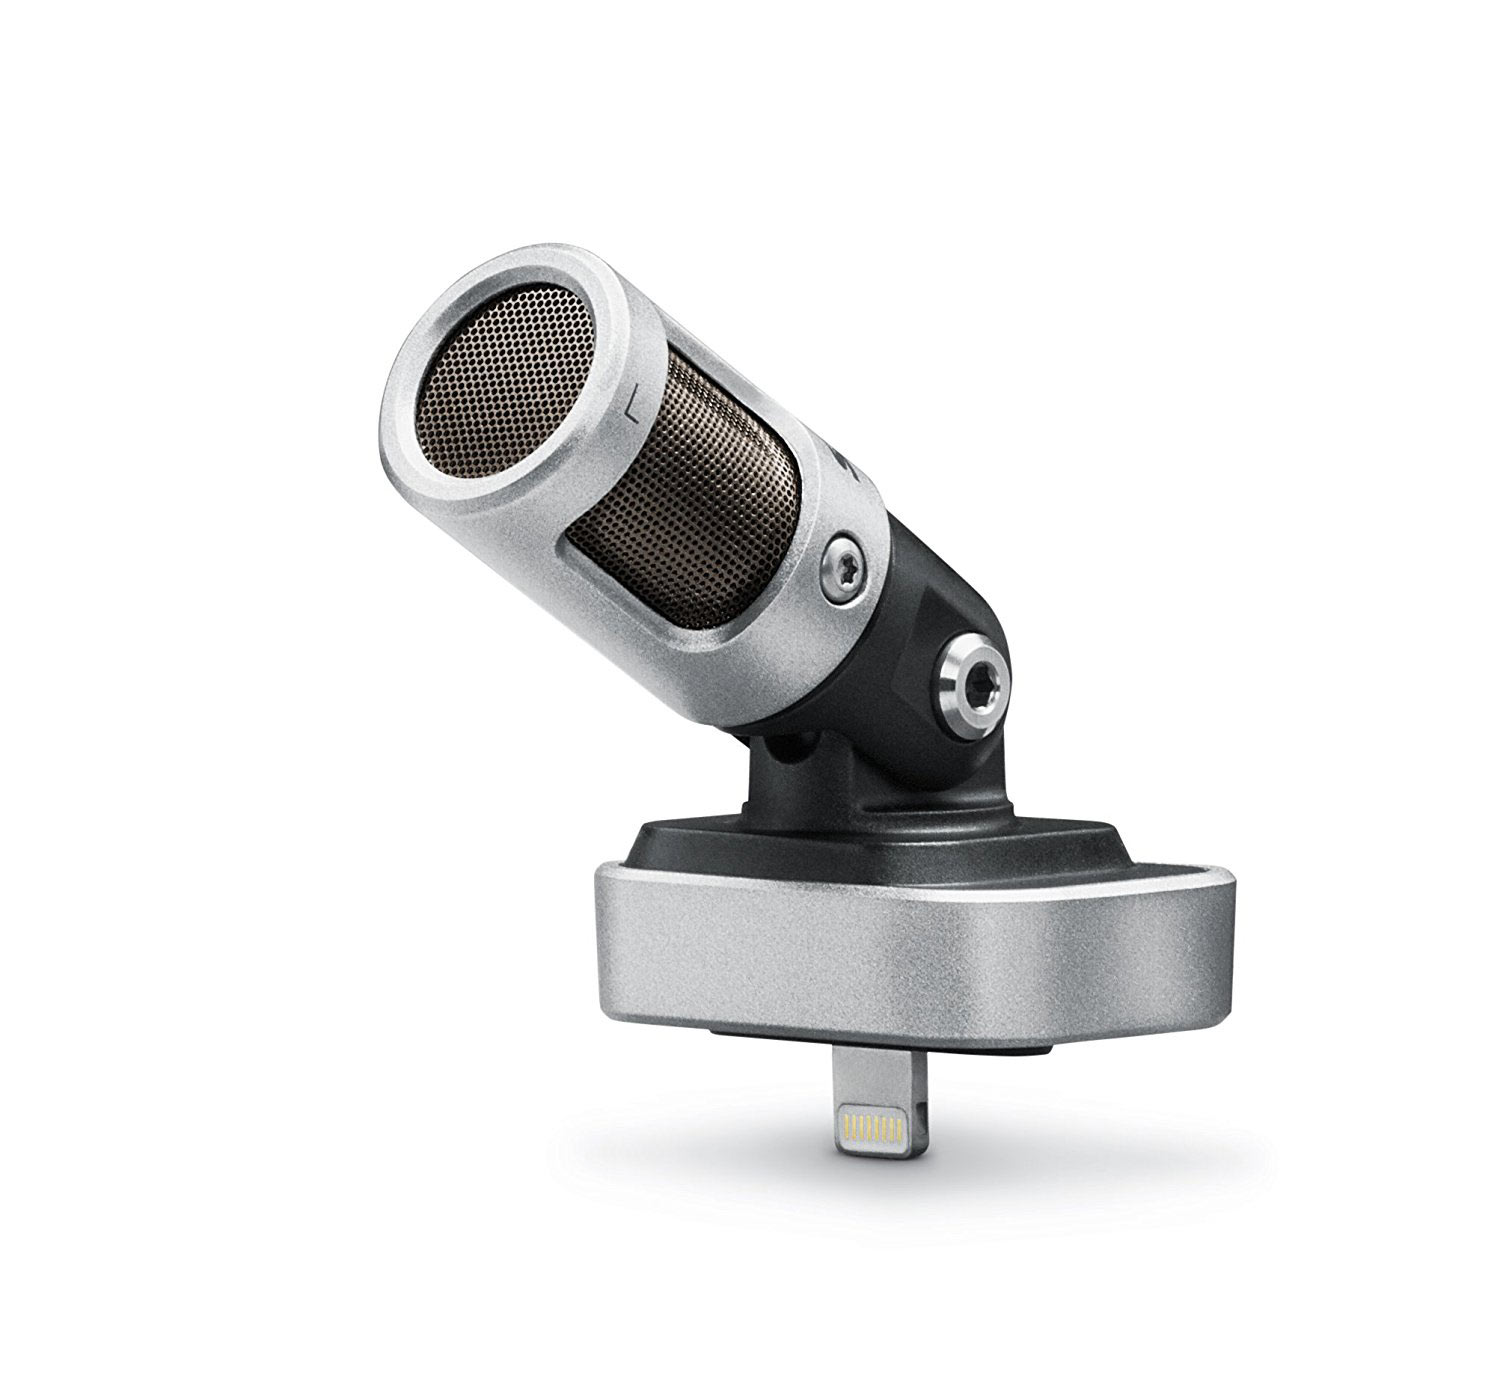
In my own work, I have been using this microphone and, over all, I am pleased. It plugs right into the lightning port of an iPhone, and it has piles of control options via its free app, Motiv Audio.
For zero hassle, this is a great option. It does require the phone to be set to “do not disturb” and “airplane mode” so that cell signals don’t interfere with the electronics. This is not hypothetical. Texts and calls do weird things to the recordings. WiFi can still work in this scenario.
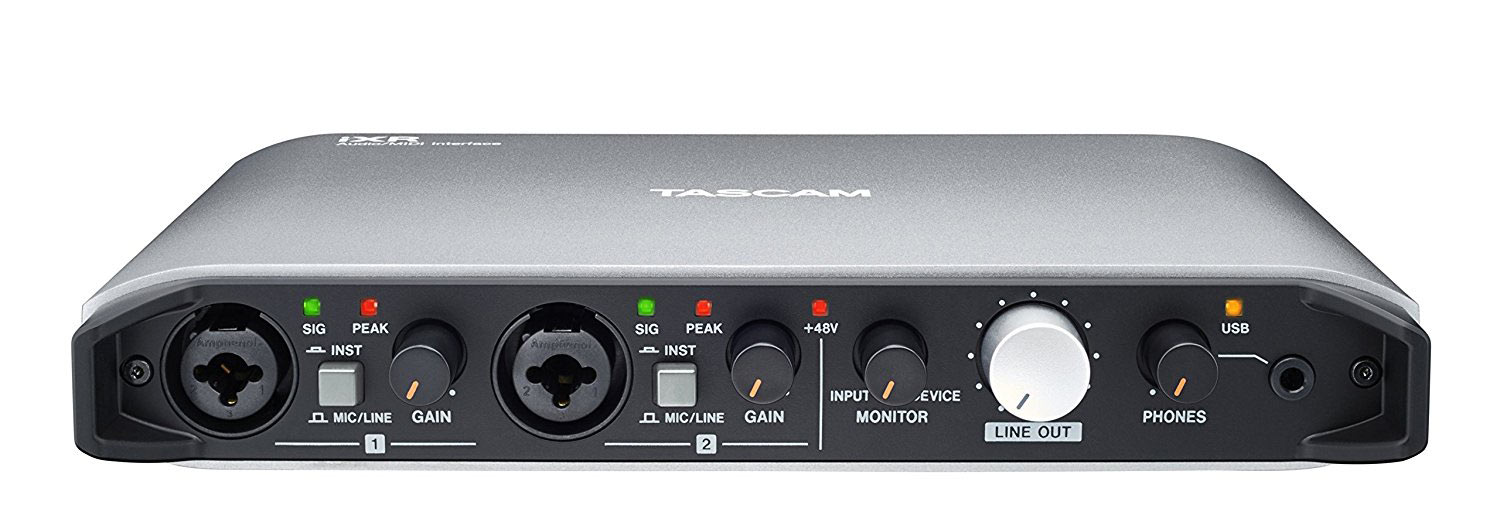
During my research, I was looking for a two-channel interface that could work with mobile technology. Thanks to my friend and sales rep Vern at Sweetwater, we came up with two solid options. The Tascam was first on the list. The interface boasts connectivity to your iPhone or iPad directly via USB and the lightning port on your iOS device. With this option, you can use your favorite stereo mic pair and send your mobile device an excellent audio signal.
With interfaces, it is important to remember that they cannot charge your mobile devices. Make sure your devices are fully charged for live streaming!
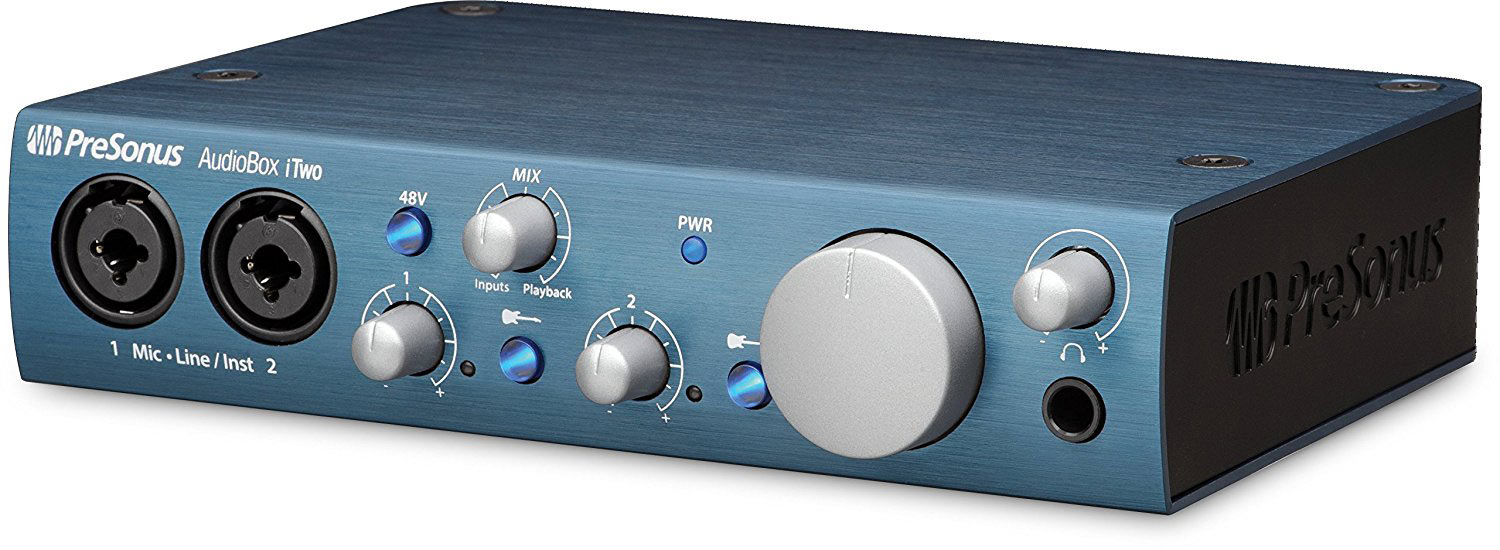
Presonus also makes an iOS-compatible, two-channel interface. I have yet to try out this unit, but I do know that Presonus is an excellent company with great, affordable products. I once used an interface of theirs for ten years before I finally upgraded, and I was still able to resell the device! The iTwo interface is also iOS compatible and has overall better reviews than the Tascam.
Whichever way you go, make sure you talk to a sales rep about compatibility with your video device.
I came across this app and subscription service during my research, and it is extremely appealing. For a relatively affordable monthly cost, you can use multiple iOS devices to create a multi-camera shoot. This is a pretty attractive option when you’re ready to take the next step and make your live stream productions look more professional by using multiple camera angles, but are not yet ready to invest piles of money into dedicated cameras, switchers, and computers or encoders.
The blog about Switcher Go explains the basic functions of their product. For $29 a month (just do a month at a time if you are not streaming every month), you have access to their software which allows you to connect as many as nine iPhone or iPads as external cameras, wirelessly. With a few friends (who have iPhones or iPads) and some mic stands and mounts, you can create a really professional looking multicam production with an external audio source and other cool abilities.
Stands and Mounts for Mobile Devices
With all of these mobile-based solutions, there are two things you cannot forget: a stand and a mount for your device. I recommend using a good tripod microphone stand with a boom arm, and a phone mount of your liking. (There are so many to choose from.)
My favorite microphone stand is the K&M Tripod microphone stand. I have personally used these for all sorts of applications, and they have never let me down. One of them is almost 15-years old.
There are so many accessories for mobile devices it’s almost obscene. My personal favorite device mount is the Accessory Basics, but I’ll trust that you can do your own homework. When choosing, consider the compatibility with the device, and also make sure the rear camera and the lightning port are accessible while mounted so you can plug in your external mic and still get a good shot. If you are using an iPad, the same considerations apply.
External Camera and Encoder Set Ups
If you are not inclined to use mobile technology, there are other ways to connect external cameras to encoder hardware or software, and then send that signal to a streaming platform. For the beginner, I find this more problematic as it typically requires a computer, more computing power, and—if you want a multi-camera shoot—more hardware.
This is not to say that you shouldn’t do it! As you do your research, just be aware of the cost concerns to get a signal similar to what you could get with a mobile device. External cameras sending video to a computer will also typically need external audio.
External Cameras and Encoder Highlights
Zoom Q2n (audio & video solution)
Zoom has been a long-time player in the mobile A/V world. The Zoom Q2n is a microphone stand-mountable camera and X/Y stereo microphone all-in-one. For a relatively low cost, you can have video and audio going to a computer for streaming via the HDMI out. As always, be wary of adapters if your computer is not already designed to accept an HDMI connection (which carries both video and audio).
Open Broadcaster Software (encoding software)
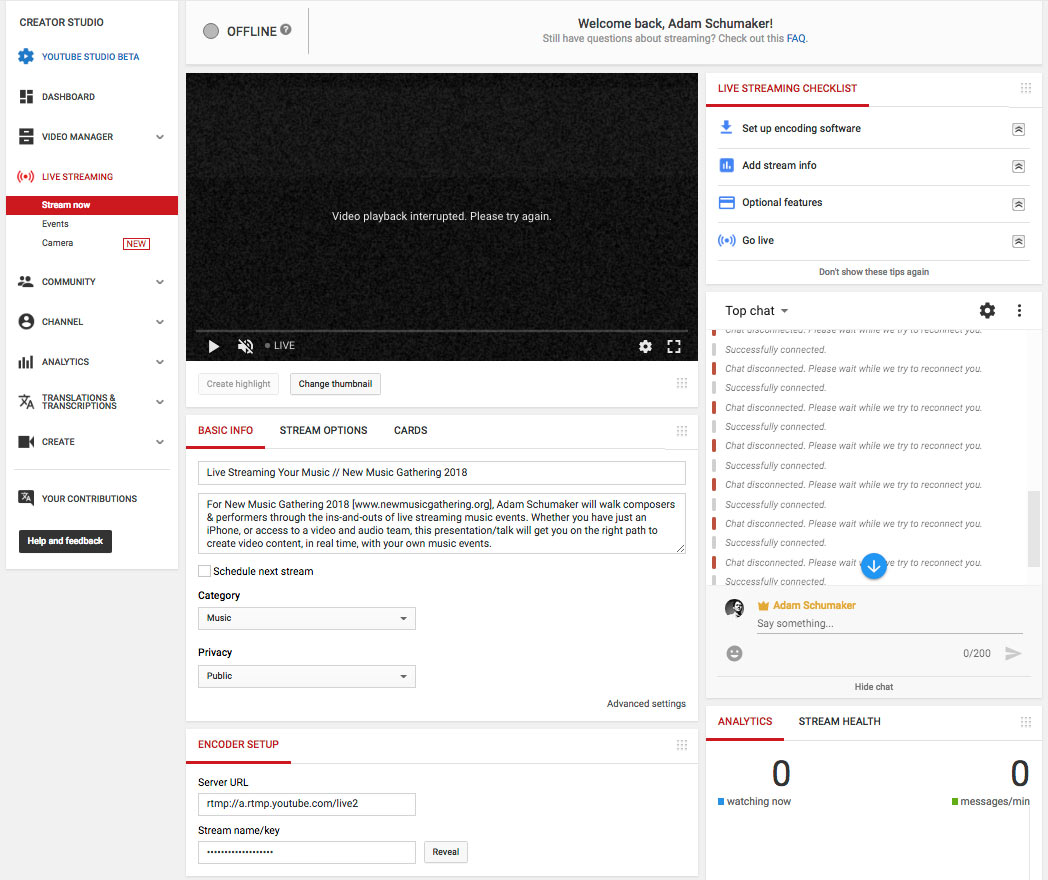
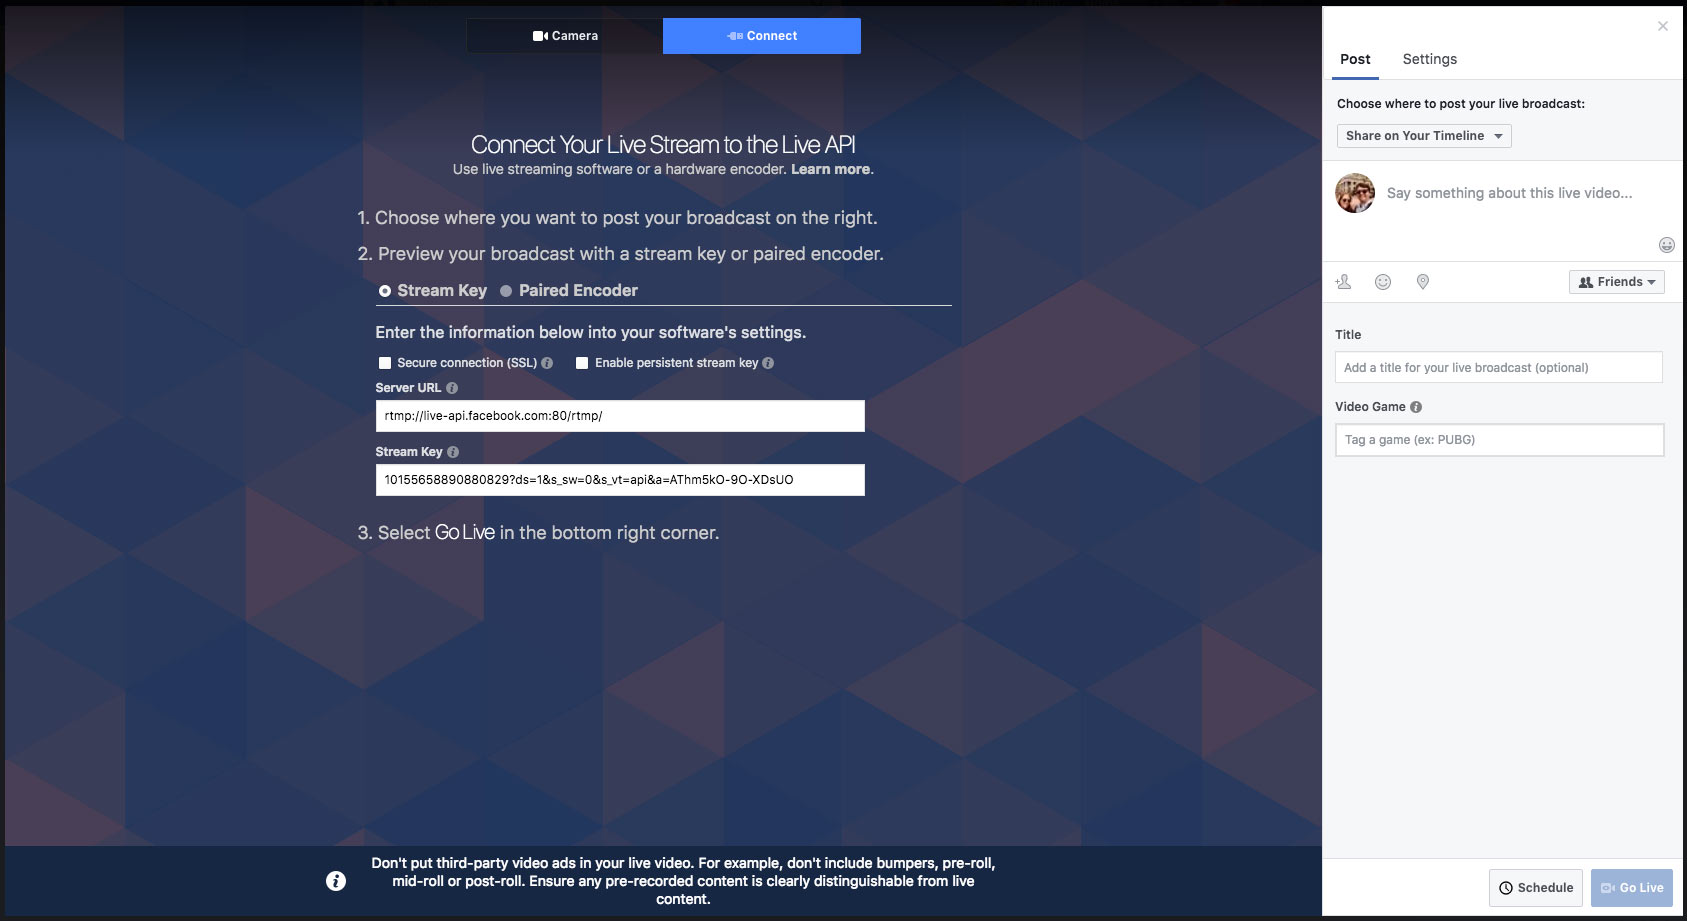
Some external cameras are able to connect to Facebook Live via the “create” link (as discussed in Livestreaming 102), but if they can’t, there is a simple and free solution. Open Broadcaster Software (OBS) is a great program for Mac and PC that allows you to take incoming video signals and broadcast them to a streaming platform such as YouTube or Facebook. Although it has a simple interface, OBS has many options for intake and output that make it a versatile and useful program. With OBS you can have multiple video sources, separate audio sources (if needed), graphics, and other media inserted into your stream. Please note that the higher the quality video you are working with, the greater processing power you will need from your computer.
Side note: as mentioned above when discussing the Zoom Q2n, some cameras will not simply send an HDMI signal directly into your computer. I encountered this when trying to send a GoPro HDMI signal to my 2012 MacBook. Without something like a Game Capture HDMI to USB 3.0, there is no way my MacBook would accept an HDMI signal. Not all camera/computer setups are like this, so it’s important to do your research.
Look for Future Tech
Since preparing my presentation on live streaming for the New Music Gathering, my Facebook has been bombarded with ads from companies trying to sell me live streaming hardware and software. We are definitely in the middle of a boom of new live streaming technologies, which is exciting. So before you commit to a specific system, see what is out there that might best fit your needs, budget, and existing equipment.
Test Everything, Then Test Again
I cannot stress enough the need to test all components of your stream before the day of the event. Make sure audio, video, internet connection, and the output to your specified platforms all works, because usually something will go wrong and you will need the reassurance that you had it working before! Here’s a simple checklist:
1. Test your internet connection and speed
2. Test audio and video sync, shots, and levels
3. Test the connection to your streaming host/platform
4. Test with an actual stream; make sure your audio sounds like your audio before it hits the internet, and your video is clear and not choppy!
5. Check all connections and settings again before the event
In my final article next week, I will discuss live streaming with collaborators (and how to think about building those relationships), best practices for use of your video post-stream, easy ways to achieve graphic overlays and title slides, licensing and copyright issues, and ways to build your live streaming audience.